Showing posts with label Fuel Tanks. Show all posts

Tuesday, May 3, 2011

Getting Ready to Seal the Tanks

Another productive day, we got a lot done! Continuing on the tanks we finished the installation of the vent lines and the capacitive senders. These weren't too difficult to install except for feeding the wire through the notched snap bushings and tightening the screws on the outboard capacitive senders. We also were able to get the flop tube installed in the left tank. Unfortunately we forgot to take a picture of how we safety wired the flop tube to the elbow AN fitting but it turned out looking great. In the next couple of days we'll hopefully have sealed tanks!

Sunday, May 1, 2011

Finished Installing Ribs in Fuel Tanks

Well it's been quite a while since I've posted anything new on here, but good news... all of the ribs are in the fuel tanks! Yes we have continued to work on the project, so don't lose hope in us. We've actually been making some pretty good strides in our progress! I've been busy with other things outside of RV building lately and haven't had the motivation to post lately but it's been too long since I've written!
These past few weeks we've been working away on the fuel tanks. These things are so much work! It's definitely messy work too. To have all of the ribs in is definitely a relief. We've had a few RV builders check out our work so far and they've all said the look like the shouldn't leak. Now all we have to do is finish the vent line and install the capacative fuel senders. These things are already almost complete so we should be sealing the tanks up soon!
To take a little break from the fuel tanks, we fabricated the pitot tube out of the supplied soft aluminum tubing. This thing was a piece of cake, we just double check how it is installed since you have a drill a hole through the main spar.

Tuesday, April 5, 2011

More Fuel Tank Sealing


Well today Dad and I delved into sealing ribs in the left fuel tank. In our previous work session we got the stiffeners, fuel tank filler, and fuel drain sealed and riveted into the left tank. Today we wanted to catch the right tank up to this stage so we got to work on that. While our rivets soaked in an M.E.K. bath in our Starbucks Expresso bottle we got prepared to rivet. We followed the same procedures that we used on the left tank except for one exception. Instead of using -4 lenght rivets for the drain, we went down to -3.5s. Reason for this is that the -4s were too long and tended to "lay over". We're not going to worry about this though since the drain is a non structural component and it's battered up with a good amount of sealant (which is also a strong adhesive).

Once we caught the right tank up we moved on to riveting the interior ribs for the left tank. This proved to be more difficult than the stiffeners since you're working in a more confined area. We put the skin in our cradle and clecoed in all of the ribs minus the one that we would be working on. This is recommended so the fuel tank stays straight and maintains its shape. We mixed up our sealant and got to smearing! Before we did though we scored the flange (and previously the skin) with emory cloth to provide a prime adhesion surface, once we were done with this we made sure to put a thick layer of sealant along the whole flange of the rib. Once it had a good layer we slid it in and put a cleco in every hole to pull it tight. Our riveting process had us rivet the front half of the bottom of the skin, then the full row of rivets on the top, and then finish the remaing half of bottom rivets. Van's tells you to rivet from front to back in order to eliminate slack.

We were able to finish two ribs today which made us happy! They are definitely a lot of work and we shall get back to work on Thursday.

Saturday, April 2, 2011

Fuel Tank Sealing

Well today after work Dad and I thought we'd begin to tackle the job of sealing the fuel tanks. Needless to say we've been dreading this task for a while. Tank sealant isn't exactly the easiest or cleanest stuff to work with. Before we began to mix up some sealant we put the whole left tank together for a dry fit (minus the vent line) to see how everything went together and to make sure if there was enough clearance between the capacative senders and the stiffeners. Everything looked good so, Houston, we have clearance! Once we were satisfied that everything would go together smoothly we began to scuff the rivet lines with medium grit Emory cloth. We did this to promote better adhesion since the rough surface creates more surface area. After this we used Coleman lantern fuel to clean the tanks off. This stuff works pretty good, it takes up all of the oils and leaves no residue. It doesn't smell too bad either like M.E.K. or anything. After we had the skins cleaned up and our tools all sorted and prepared we started to mix the tank sealant. We used our small digital scale and measured the stuff out cup by cup. It's mixed in a 10:1 ratio and it took a couple of attempts to get comfortable with working with this stuff. It's like tar. Extremely thick tar. After mixing for a couple minutes the black hardner was mixed with the white base and we were left with a dark grey substance. We followed the tapes instruction and had the stiffener rivets taped in place (we did four stiffeners at a time) then we smeared the stuff in nice thick layers on each stiffener and set it in place. Then we backriveted them and went back over the shop heads to make sure that we had a good seal. We repeated this a few times and had all of the stiffeners in place and set. After the stiffners we put the fuel drain in place and set its six rivets. This made a mess because sealant oozes out of the holes from both sides and gets all over your squeezer. Have an old rag soaked with laquer thinner to do some quick clean up for your tools and anything else you might need. After the fuel drain we moved to the fuel filler flange and smeared a bunch of sealant on it. We put it in place and put the vent clip on the very front rivet. We got these rivets bucked and decided that's all the time we had for the RV tonight. We cleaned up all the excess sealant with a rag and some laquer thinner and are now just letting it cure! I'm glad we only did one tank tonight. It gave us a chance to get used to working with the sealant and didn't overwhelm us. In a couple of days we'll be back out to do the right side! Also, sorry no pictures tonight. We left the camera at the house.

Friday, April 1, 2011

Fuel Tank Prep

Today before work Dad and I thought we would prepare the fuel tanks for their sealing. So we did just that. I still have a couple of questions on the capacative senders and the vent line but we still got a lot done today. We had already drilled the filler caps to the tanks a few days ago, but that's all we had done to them. We took them off and I got to countersinking them. While I did that Dad taped in some rivets so we could back dimple all of the holes that needed it. Once we had the filler all in place we moved on to the drain sumps. These were pretty straight forward. I just used a square and drew a line through them from front to back and we lined the holes on the drain up with the line. No one will ever see them, but at least they're symetrical! While we were on a roll we wanted to keep going and get as much done as possible. We dimpled the perimeter screw attach holes with our squeezer and they turned out great (Van's says you get better results with a C-frame but I don't know how.) Since I had to work at 3 today, we left enough time for us to watch a Fuel Tank Sealing tape. The thing was shot in the early 90's most likely but hey, it's still relevant and we both learned a lot! After that I had to leave for work and Dad got to work on notching out the vent line snap bushings, he did a nice job on them and that was all we were able to get done today but we're happy!

Wednesday, March 16, 2011

Fuel Tank End Ribs


Today Dad and I figured we would get cracking on the fuel tank pick up tubes. In the last post I noted that we would have to make a new hole for the flop tube, which would be located at the front of the inboard rib, and not on the access plate. We had already cut out the hole for the standard pick up tube in the plate and instead of making a cover for the hole, Dad fabricated a beautiful brand new one out of some .060" stock that we had. It looks great!
The hole up for the flop tube was a multi step process. Our unibit only goes up to 1/2" and the fitting was significantly bigger (I can't remember the diameter) so we used ours, and then finished the hole with our friends larger unibit. We had to do this for the rib, the angle bracket, and the backing plate. There is a proper position for the fitting noted in the plans, but we didn't see this until after we had cut the hole. Lucky us we were within 1/16 of an inch!

After we got the hole done, I had to head to work but Dad stayed at the hangar and continued to make some progress. He was able to cut an anti-rotation bracket for the right tank pick up and he also made the trap door that fits over the corner hole on the interior rib. After that he made the bracket that goes over the left side inspection plate so the flop tube doesn't get hung up. We still have the othe one to make that fits inside the bay.
All in all, today was a pretty productive day!

Wednesday, March 9, 2011

Fuel Tank Update

Today we received our new "flop" fuel line from Van's. The craftsman ship on this is beautiful! It really looks like high quality stuff, not that I didn't expect it, but it still impressed me. Though after looking at how it is mounted to the root wing rib, I realized that it mounts to the very leading edge of it. We already cut the holes in the access plates and we'll have to make a plate to cover the hole in the left side access plate. No big deal, but I'm glad we're starting to figure out how this thing attaches and functions.


Left: Our new flop tube!

Right: The left angle that needs be cut to accept the 90 degree fitting for the flop tube.

We might take care of this tomorrow, but we want to get the ailerons riveted together to get some parts out of the way! I'll have to be leaving the airport around 2:30 for work so we'll see what we can get done! Looking forward to manana.

Thursday, March 3, 2011

Priming!

Finally! A day that Dad and I both had off and the weather was good! The weather forecast called for 65 degrees today but it ended up being about 72. We knew we were going to be able to get a lot done today, and we did! After the ritual breakfast at the cafe we headed over to the hangar to get to work.

We started by rolling all of our stuff out of the hangar (work bench for parts and paint, saw horses, air compressor, etc.) We used our normal process of preparing our parts, they were all previously Scotchbrited and we started with the Alumiprep today. Dad scrubs the parts to be primed, and I have the task of rinsing and drying the parts, then we set them all in position on our saw horses on top of a metal grate. There were a few clouds hiding the sun, but they blew in and out. Once the parts were all cleaned we immediately got to mixing our two part epoxy primer. This stuff isn't as nice as the self-etching stuff in the can, but it gets the job done. It took a good couple of hours to get all the parts primed and covered well. We primed the parts for the flaps as well as the aileron skins, a couple of wing ribs, the fuel tank baffles, and some fuel tank brackets. The difficult part is finding the spots that you missed. The primer is almost exactly the same color as the milky-white Alumipreped metal so you have to let it dry, then angle it to the sun to find the bare spots. It felt good to get these parts primed though! We've been waiting to do this for a while.

While we let the parts dry, we cleaned up our work area and got some stuff put away. We primed the aileron skins so we would be able to get the stiffeners (previously primed) riveted to them, and that's exactly the next step we did. We used the backdimpling method the plans call for and continued to work outside since it was such perfect weather. Our method consisted of filling four rows of rivet holes with rivets, taping them and then backriveting. Once the four rows were finished, we'd fill the next four rows and reuse the tape and so on. This way we were efficient and fast. Once the stiffeners were riveted we decided to call it a day and get heading home. The next step was to finish the bend in the aileron skins and our homemade bending break was at the house (it's already in the truck ready to go for tomorrow though) All in all we had a productive day, and only one rivet had to be drilled!

Tuesday, March 1, 2011

Priming Prep

Today I met Dad at the airport and we decided to get all of the parts ready for priming. They're all pretty much prepared but we organized them into a pile for when we'll be priming. Also I took a friend of ours flying today, it was his first time being in a small airplane, and he had a blast! He'd been in airliners and a C-130 before, but nothing along the lines of a 44 year old Cessna 150. Needless to say it was a new experience for him. No need for any pictures tonight, everything mostly looks the same, except for the left fuel tank skin, which we dimpled today. Hopefully we'll be able to prime on Thursday!

Tuesday, February 22, 2011

Dimpled Right Fuel Tank

Today the only work we were able to really do was dimpling the right fuel tank. We used our normal method of back dimpling and while we were doing this I remembered that there are special dimple dies out there specifically for the fuel tank skins. Why? Well the fuel tank dimple dies put a deeper dimple in the skin to allow more room for the tank sealant. We spoke with our friends Jack and Dwayne to see what they thought. They suggested that since we had already dimpled a whole fuel tank skin that we take our deburring tool to take a bit of material out of each dimple. This would allow enough room for the tank sealant and for the rivet to sit flush. After a bit of trial and error using slow electric screw drivers and countersink bits, we ended up using the deburr bit in its handle. A few quick twirls took enough material out to let the rivet sit deep enough. We've realized that this is a common (not mistake or error, but phenomenon?) with many RV's out there, if it isn't dealt with, you are left with rivet heads that don't sit flush and are high enough for you to feel with a finger nail. Not the biggest deal, but we want our wings to be smooth so we'll be putting in the extra effort up front!

Thursday, February 17, 2011

Inboard Fuel Tank Ribs

After breakfast at the cafe today Dad and I had to take care of a couple of errands but once they were done we headed over to Smitty's to pick up some of the two part epoxy primer so we could start getting some more parts primed! Though today's weather wasn't quite good enough to use it.

Dad and I began working on the inboard fuel tank ribs to get the ball rolling with them again. We started by cutting the access hole in the rib with the flycutter. This was my first time using this tool. Like everyone says, make sure you have the part you're cutting clamped down extremely good. This thing could take a part and throw it accross the room in a second I'm sure. We changed the belt on the drill press for this and set it to the lowest setting, this helped a bit with controlling this beast. After the ribs were cut we clamped the access plates to them and match drilled the holes. Once the plate is drilled the ring goes on next and the platenut holes get match drilled. We realized that there was a bit of rib left inside the ring on each so Dad cleaned them up with the Dremel and got them perfectly equal with the ring. We deburred everything and decided to call it a day, it looks like we'll just have to wait for some nice weather so we can get some priming done! Until then we're in limbo.

Thursday, February 10, 2011

Countersinking Fuel Tank Skins

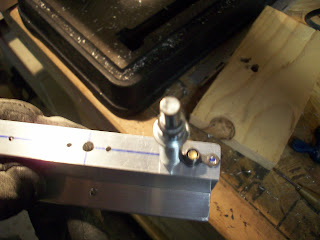
Continuing from the past couple of days, we picked up on the right fuel tank. I had the T-405 angle all drawn up from Monday and just had to cut it out. With a few swipes on the band saw and about fifteen minutes on the bench grinder we had our second one done! To get the hole pattern on the second one I just clamped them together (they mirror eachother) and match drilled it. Once we had both of our brackets ready, we clamped them to the inboard ribs of the fuel tank and match drilled them. We made sure to leave a bit of room between the angle and the skin since there will be rivets being set right there. It looks like enough room for a shop head, but if we need to we'll just put a few notches in the angle once the rivets are set. After the rib itself was drilled, we clamped on the T-410 plate and match drilled this, yes we match drilled a lot, but it provides the best results!


The plans call for the fuel tank skin to be countersunk where the baffle attaches to it. We weren't sure if we were reading this right because skins are normally dimpled since they're so thin. This skin was .032" so it wasn't as thin as others, but we still decided to research this a bit more. We found out that this was correct and the reason for this is to make it easier to fit the baffle in upon final completion. It has to slide into place and if it were dimpled it would make it more difficult get into position. I'm guessing they want these steps to be as quick as possible since you're using Tank Sealer.
While I did the countersinking Dad finished devinyling all of the rivet lines on the skins for the tanks and they are now ready to be dimpled. Towards the end of the working day I got acquainted with the capacative fuel senders. I finally have an understanding on how they work and they seem pretty simple. At least there's not going to be any moving parts in our tank! Except for maybe a flop tube, and trapdoor..

Tomorrow after work I hope to continue on the capacative senders and get the tanks ready to be sealed! Eventhough we have the tanks ready for the most part I feel it'll be a little while before we're ready to start the sealing process, which I hear takes a few days to do correctly.
And yes, I cut my hair. FEELS GOOD.

Wednesday, February 9, 2011

Right Fuel Tank

Well these past few days Dad and I have been continuing our work on the fuel tanks. Once the left tank was mostly done, (still have to countersink the skin where the baffle attaches) we started the right tank and now both are at the same stage. We've just been forgetting the camera! Tomorrow we should be able to get the tanks ready for the capacative senders!

Thursday, February 3, 2011

More Fuel Tank Work

Another productive day today! As always the day started out at the cafe to have some breakfast and load up on coffee. We met our friends there and after breakfast decided to head over to their hangars. After a few minutes of talking with our friend Dick he offered to take me up in his RV-6. I couldn't say yes fast enough! What luck, he let me taxi, takeoff, maneuver, and land! After we took off we head out to do a few maneuvers and turned back to practice some touch and goes. After him doing the first one he let me in on the techniques he uses for slowing down and what airspeed to aim for on final. The first few weren't exactly perfect but they were suvivable. My fifth and final landing was almost a greaser! All three wheels down at the same time; if that's not motivation to continue the build I don't know what is! What a great ride, and it was only my second RV flight to date. Got to log that one.

After the ride it was time to get back to the real world. Dad and I headed over to the hangar and got to work! The fuel tank skin was still clecoed to the spar from yesterday so we continued from there. If the skin doesn't match up perfectly with the spar/baffle/leading edge, then you're supposed to elongate the holes that you previously drilled through on the baffle. Ours however came out perfect! Just a couple of holes had to be re-drilled to make the baffle fit a bit easier to the brackets. The plans call for the ribs to be clecoed to the Z-brackets and the baffle, then match drilled. After using the long #30 drill bit to get these done we headed out to lunch.

We took off the ribs and clecoed them to the skin. Man the tank looks (and feels) awesome with the ribs in it. Once they were in the assembly goes back onto the spar to be drilled to the W-423 joint plate. We did this and decided to drill all of the holes in the skin (this was where we made a mistake). The plans say to only drill the joint plate while the tank is on, this way you don't accidently drill into the spar. Well dummy me missed that part of the plans. After we pulled the tank off we noticed we nicked the spar a bit with the drill. About five nicks got put into it that will need to be sanded/buffed out. They're not critical, but we don't want anything that can develop into a crack on our spar! I sanded them down a bit and they're already pretty rounded off, but I still need to get them perfected out.

With the tank off we finish-drilled the tank attach holes with a #19 drill for the attach screws. This thing is looking awesome! While I'm at work tomorrow Dad's gonna head over to the hangar and start devinyling some skins and dimpling a few parts. After work I plan on countersinking the tank skin for the rivets that attach the skin to the baffle. We're making progress slowly but surely!

Wednesday, February 2, 2011

Fuel Tank Work

Well today before work I decided I would continue working on the fuel tank skin for the right wing. I began by marking the stiffeners to be cut then got this finished in a jiffy with our bandsaw and our friends 30" shear. Thing works great! After they were cut roughly to shape I took them to the Scotchbrite wheel and rounded off the corners. The plans call for you to cleco the stiffeners to the skin and match drill them, then put the assembly onto the spar. So that's exactly what I did! Even without the ribs in I could tell the fit was going to be awesome, it's amazing what match-drill manufacturing can do. This was all I was able to get done today so I decided to finish there and head to work. Sad day! If only I could stay at the hangar all day.

Thursday, January 6, 2011

Able to get back to work!

Well it feels like it's been forever since we've been able to work on the project but it's been cold in the hangar! Well at least it's been a bit too chilly to work on it. But today we finished the T-712 fuel tank brackets and now have a large pile of parts that need priming! I won't be able to work on the project tomorrow since I'm flying up to Flabob straight after work for the monthly movie they play, but I plan to get back to work on it on Saturday.

Tuesday, December 14, 2010

Finished Work on Z-Brackets

Today Dad and I picked up where we left off on the T-712 Z Brackets that attach the fuel tank baffle to the main spar. Since we finished priming and countersinking them, the next step was to rivet the K1000-3 platenuts to them in order for them to be bolted to the spar. We set all of the rivets and they turned out beautiful! 12 of the 14 had already been drilled to the spar and the remaining two were the inboard brackets, I'm not too sure why they have you hold out on these, but you're supposed to match drill these to the spar once the baffle is clecoed to the other brackets. After the spar was off of the wing jig and back on our work bench we clecoed the bracket to the baffle and got to drilling.

Well the first one didn't turn out too great, in fact it's unusable! A simple mistake led to a $2.50 replacement part. Our mistake? We held the bracket agains the spar too firmly which caused the baffle to flex, with it drilled in this position the hole is in the wrong location when the pressure is taken away. Oh well, our part should be here Thursday and we'll be back in business!


We also went over the wing ribs one last time and made some fine adjustments. After handling them so much getting the scratches out of them we realized they got a bit out of alignment, therefore we had to re-flute them. They're all straight once again though and hopefully we'll be able to prime them this week!

Thursday, December 9, 2010

Z Brackets for Fuel Tank Baffle

Well after some breakfast with Dad and some friends at the cafe we decided to get to work, but we couldn't just yet. Just as we were leaving the cafe, a beautiful -8 pulled up and well, being RV builders we couldn't pass up the opportunity to chat about our similar tastes! The pilot's name was Barry and he was teaching a friend to fly, we talked about the aircraft a bit and became friends! After our chat Dad and I had to bring our trusty Cessna 150 over to the maintenance hangar for her annual today. The first few hours of our day was devoted to this task and found out what does and what doesn't need to be replaced this year. Oh the joy of airplanes, there's always something to fix on them!

After the maintenance hangar closed Dad and I headed on over to our hangar and decided to pick up from where I left off yesterday. Today we drilled the Z brackets to the main spar for the right wing today. Once we had these all match drilled we began drilling the platenuts to the Z brackets. A cleco here, a cleco clamp there, a drill press and some time was all we needed and we were able to get six of them drilled, we had to do some grocery shopping tonight so we had to leave time for that as well unfortunately.

Many reasons for the lack in posting lately, and I feel bad for that. Works been keeping us both busy and I've been spending some time at my mom's as well, dividing the time is hard when there's so much to do! Also, holidays always seem to delay something, whatever it may be. But we're still progressing on the project that's for sure!