 Today Dad and I picked up where we left off on the T-712 Z Brackets that attach the fuel tank baffle to the main spar. Since we finished priming and countersinking them, the next step was to rivet the K1000-3 platenuts to them in order for them to be bolted to the spar. We set all of the rivets and they turned out beautiful! 12 of the 14 had already been drilled to the spar and the remaining two were the inboard brackets, I'm not too sure why they have you hold out on these, but you're supposed to match drill these to the spar once the baffle is clecoed to the other brackets. After the spar was off of the wing jig and back on our work bench we clecoed the bracket to the baffle and got to drilling.
 Well the first one didn't turn out too great, in fact it's unusable! A simple mistake led to a $2.50 replacement part. Our mistake? We held the bracket agains the spar too firmly which caused the baffle to flex, with it drilled in this position the hole is in the wrong location when the pressure is taken away. Oh well, our part should be here Thursday and we'll be back in business!
We also went over the wing ribs one last time and made some fine adjustments. After handling them so much getting the scratches out of them we realized they got a bit out of alignment, therefore we had to re-flute them. They're all straight once again though and hopefully we'll be able to prime them this week!


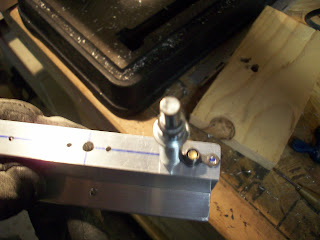 After the maintenance hangar closed Dad and I headed on over to our hangar and decided to pick up from where I left off yesterday. Today we drilled the Z brackets to the main spar for the right wing today. Once we had these all match drilled we began drilling the platenuts to the Z brackets. A cleco here, a cleco clamp there, a drill press and some time was all we needed and we were able to get six of them drilled, we had to do some grocery shopping tonight so we had to leave time for that as well unfortunately.
 The construction of the flaps starts by clecoing the end and center ribs to the flap spar and match drilling all of it. The holes for the center ribs are punched a bit small, and they get drilled out to #30 to accept the LP 4-3 blind rivets that are supplied. These rivets hold all of the flap ribs to the spar. We also fabricated the small spacers that fit underneath the trailing end of the end ribs. Once this was done we clecoed the assembly to the bottom skin and match drilled it. It started to look like a flap!
 The manual tells you to look out for small gaps that may occur between the "trailing edge" of the bottom skin and the center ribs, if there are any, you have to make small spacers to fit the gap. We only needed to make two of these and made them out of the ".025 T-3 sheet. This fit perfectly and made for a snug fit.
 We began to work on the piano hinge for the flap and decided we would follow our friend Dwayne's idea and split the hinge pin into two pieces that secure to the flap brace on the wing towards the center of it. This requires a few of the links to be removed in order to be able to access the pins. We're going to save this for a later date though once we have our pile of parts primed and once we catch up!


